Engine Disassembly
The CB500 engine is quite a simple design, especially given it’s a single cam design. However, it does require quite a bit of attention and focus during a rebuild to ensure you don’t miss anything. I made sure to take a number of photos throughout the process so I could remember how it all went together. One problem I did find with my particular engine was that most of the parts behind the side covers were sitting in the boxes that came with the motorcycle. I also noticed certain parts were missing altogether. Hence, I had to order a number of parts from overseas which took awhile to arrive due to Covid.
I commenced disassembly from the top, down. I removed the tappet cover nuts first. As with many things in this build, they were in bad condition and someone previously had decided to cut grooves into them for use with a flat-head screwdriver instead of just using a 17mm socket (why?!). The breather cover and valve cover was held in place with a number of 5mm Allen key bolts which were easy to remove. The bolts underneath the breather cover were not original and were liekly drilled and tapped to a larger size in the past. Similarly, there was a decent crack in the valve cover underneath the breather cover, pointing to a failed timing chain at some stage in it’s history.


With the breather cover and valve cover removed, The camshaft and timing chain were visible. To remove the head, the camshaft sprocket was unbolted from the camshaft, allowing it to sit further down and take tension off the timing chain. The camshaft along with the sprocket could then be wriggled out from the head. To ensure the chain wouldn’t fall into the lower engine case, I used a spanner to keep it in place.


I could then start to remove the head stud nuts. Many of them sit underneath rubber pucks which could be removed with a pick.
With the head nuts removed, I could then remove the head and cylinder jug. The head took some prying and force to remove it. The cylinder jug could then be removed, taking it off carefully to ensure I didn’t damage the pistons. At this point, the top end was essentially all disassembled. Not as difficult as I thought!


Removal of the cylinder jug and head then provided access to each piston. The circlips holding the wrist pin in place were removed from each side of the pistons using a pick and pliers. The wrist pin could then be slid out and the piston removed.


Head disassembly
In order to organise reconditioning of the head with my mechanic, I had to remove all the intake and exhaust valves. I purchased a cheap valve compressor off eBay to do this. Once I compressed each valve enough, I used a telescopic magnet to remove the half crescent pieces that sit in each valve. This then allowed me to remove the valve and the accompanying two springs. I made sure to bag and tag each valve assembly so I know which valve came from which cylinder.


In the exhaust opening of each cylinder, there is a copper gasket that is used to seal the exhaust system to the head. Mine were definitely very worn and needed removal. I simply used a hook pick to remove them.

Engine case disassembly
With disassembly of the engine cases, my first step was to separate each half. I firstly begun by using an impact driver to remove the stator from the crankshaft.

From here, I started removing the bolts from the bottom of the engine. This involved removal of the larger crankshaft bolts remaining bolts. I made sure to bag and tag each bolt and take photos of each bolt position to ensure I didn’t get them mixed up. The sump was also removed easily. The oil pickup underneath the sump can then be lifted out.


From here, I then turned the engine case over and removed the bolts from the top of the engine. Once all the exterior bolts were removed, I could use a pry bar and rubber mallet to remove the top engine case. Picture below shows the success I had thus far in the disassembly.


With the engine cases separated, I worked with the lower engine case to disassembly the rest of the engine. Starting with the transmission, the output shaft connected to the chain sprocket could be simply pulled out, making sure not to lose the ring that sits on top of the shaft bearing.

The second shaft (the one closer to the crankshaft) was harder to remove. I removed the circlip holding the clutch gear onto the shaft, which then allowed the gear to be removed. The bearing retainer behind this was then removed, which was held in by two M6 bolts. This shaft could then be pulled out, with the primary chain, damper and starter motor gear remaining in place as seen in the image below.


At this point, the crankshaft, con-rods and the primary changed could be lifted out of the lower engine case. I then used a pick to slide each main bearing out of the case.
Next in the lower case was the kick-starter assembly. This firstly involved removed of the circlip that sits on the outside of the lower engine case. The spring then can be removed with pliers. Within the case, the kick-starter shaft has another circlip that needs removal. Once this is removed, the rest of the parts on the shaft slid off with relative ease. I made sure to take photos to remember the order they go on as I would have definitely forgot this come rebuild time.


I then removed the neutral switch assembly. To make sure I didn’t round the Philips head screw, I used a impact screw driver to remove it. (Tip: Definitely purchase a impact screw driver, you’ll save so many screws from being rounded in future!) Unfortunately, I broke the small tab on the neutral switch assembly so I had to purchase another one from cmsnl.com. At this point, the lower-case was completely disassembled.

Now focusing on the upper cause, I had to remove the starter motor gear assembly. Firstly, a lock washer had to be bent flat to allow removal of the bolt. The shaft holding the starter motor gear could then be pulled out, alongside the gear itself.

The gear shifter shaft then had to be removed. The gear shifters are held in place via pins that sit within the grooves on the shaft. These pins are held in place with clips, which can be pulled out easily with pliers. Once the pins had been removed, the gear shift forks slide freely on the shaft.

Finally, both engine cases were completely disassembled. I made sure to bag and tag every part so I would not lose anything. The transmission shafts and gears sat on my bench assembled.

I removed the con-rods from the crankshaft, making sure not to damage the bolts or nuts holding them on. I had to sand down a 10mm socket so the socket wall was thin enough to unscrew the bolt as well. I then bagged and tagged all the parts so I could ensure I paired the same con-rod to the same position on the crankshaft.

Replacement parts and restoration
Given the overall condition of the engine, it was clear that there were many parts I had to purchase to complete the rebuild. The list below shows all the parts that were either worn or required replacement.
- Camshaft (The lobes on the original camshaft were worn past spec)
- Cylinder jug (One of the cylinder liners had a hairline crack.
- Main bearings (Standard replacement in a rebuild.)
- Big-end bearings (Standard replacement in a rebuild.)
- Primary Chain (The original chain was stretched and needed replacement)
- Timing chain (Standard replacement in a rebuild)
- Chain tensioner belt (Standard replacement in a rebuild)
- Clutch (Missing from the engine)
- Clutch pusher rod (Missing from the engine)
- Piston rings
- O-rings
- Small end circlips
I found a replacement camshaft on eBay whilst the cylinder jug was something my mechanic was able to source.
With the engine cases, cylinder jug and head, I took them to a vapour blaster to have them cleaned up. This process made a significant difference and saved me time trying to get grease and oil out of hard to reach places. However in hindsight, an alternative like soda blasting or bead-blasting would have been significantly cheaper. So in future, I would pursue these options instead of vapour blasting. With any parts I would be leaving unpainted (i.e. carburetor bodies), I would still recommend vapour blasting as it leaves a satin appearance vs. a flat appearance from soda blasting.

Engine respray
With everything disassembled, cleaned and new parts sourced, it was time to make a start on the engine rebuild. First on the list was prepping and repainting the engine cases and other parts.
After vapour blasting, I gave the engine cases a thorough wash with soap and water using a brush in all crevices. I then rinsed them down and repeated this again another 3 times, just to be sure all glass residue was removed. I then used wax and grease remover to remove any remaining oil.
From here, I masked up the parts and used Duplicolor Silver engine spray paint. After around 3 light coats, I left them to dry for a few days. To increase the paint resistance against oils and fuel, the instructions on the can recommend you cure the paint at high temperature. To do this, I stuck them in the oven and cured them as per the instructions on the paint can. I made sure to open up my windows while doing this as it makes a very strong odour. Important note: I also gave my oven a strong clean and left the oven door open for a few days. Haven’t felt sick since using the oven so hopefully that’s a good sign!


Assembling the two halves of the engine cases
It was made clear to me that this engine was in dire need of a rebuild. As you can see in the picture below, the existing bearings within the engine were well and truly gone. I imagine this engine certainly had a hard life and likely ran low on oil.

With the CB550, there are codes stamped on the engine case that indicates what bearing size is needed. This is because of the period of manufacture in the 70’s, there was a degree of discrepancy between each engine case off the assembly line. As such, they made different sized bearings to ensure correct clearance. I looked to SOHC4.com forums for guidance on this as I wasn’t sure on how to read the stamped codes. After some discussions with helpful members, they pointed me to the correct bearings. Given some of the sizes were not easy to source, I had to settle for brown colour bearings. Luckily, this was not a cause for any concern.
I placed the main bearings into the cases and bolted the two halves together to the correct torque with some plastigauge on each bearing. From here, I then disassembled and measured the diameter of each plastigauge. They were all within spec, great success! I also undertook the same process for the big end bearings, which were also within spec.


I then started to reassemble from the rear of the cases forwards. I reassembled the kick-starter assembly with assembly lube. I undertook the same process for the starter motor assembly.

The crankshaft was then ready to be placed for a final time into the engine case, with a generous amount of assembly lube on the main and big end bearings (with the con-rods torqued to spec on the crankshaft). The timing chain was also installed onto the crankshaft. The rest of the components were installed into the lower and upper cases in essentially the reverse process of disassembly. I made sure to clean each part thoroughly and used a liberal amount of assembly lube on all components.

Hondabond HT was then used on the sealant area of one of the engine cases and allowed to get a bit tacky before placing the engine cases together. Once I sandwiched them together, I started to screw in all the bolts hand-tight from the lower case. From here, I then torqued the crankshaft bolts in 3 passes to the correct torque spec.


Clutch service
As I mentioned previously, I had to purchase a clutch on eBay as it was missing from my engine. After disassembly the clutch assembly, I measured the width of each clutch plate and found they were all within spec. As such, I felt no need to purchase new clutch plates and decided to reuse them. I placed oil on each clutch plate as I reassembled it.


I also reassembled the clutch mechanism on the right hand side of the engine. I followed the photos I took of the engine previously alongside engine schematics from cmsnl.com. With the excitement of how the engine build was going, I just had to put the side covers on and see how the engine was looking. As per the image below… what a big difference to what it was like at the start!


Piston and cylinder jug assembly
At this point, I was 2 and a half years into the project. Unfortunately, my impatience started to grow and the amount of photos I took inversely decreased. As such, I am missing photos of the top-end rebuild process. Alas, I’ll still discuss the process I followed for completion.
With the two engine cases together, the con-rods were ready to accept the pistons. The pistons were reused as they were still within spec and were bead blasted by my mechanic to remove the carbon fouling and burnt oil. Before installing the piston rings onto each piston, I test fitted each of them within the respective cylinder liner to check the piston ring gap. To my surprise, they were all within the correct tolerance.
I then proceeded to install the piston rings on each piston, following images on the internet of where the position of each piston gap should sit. From here, the pistons could be placed onto the con-rods. I lubed up the small end of the con-rods alongside the wrist pins. When assembled, I used new circlips to hold the wrist pins in place. Getting the wrist pins were a PITA though, and required meticulous use of picks to get them into place.
From here, the gasket was placed onto the engine case alongside the o-rings for the oil feeds on each side of the cylinder jug. I had to compress the rings on each piston and slowly place the cylinder jug over the top of the piston rings. I also had to feed the timing chain through the cylinder jug and have it supported with a extension bar on the top of the jug so it didn’t fall into the engine case.
Head assembly
I didn’t have the tools to lap the valves and undertake a pressure test, so I left this to my mechanic to do. As such, I just received the head back from the mechanic with the valves and springs all assembled and ready to go.
Before I installed the head onto the cylinder jug, I made sure to install the timing plate on the side of the engine, where the ignition plate sits. This was so I could correctly time the camshaft later on.
I put the gasket in place on the top of the cylinder jug and placed new o-rings on each side for the oil feed. This also required the dowel pins to be installed as well. The timing chain was then fed through the head and the head was aligned with the cylinder jug with help from the dowel pins.
I could then torque down the head bolts doing 3 incremental passes to achieve the correct torque spec.
Next was installing the camshaft. I kept the timing sprocket unbolted from the camshaft so I had enough slack in the timing chain to feed the camshaft through. Once the camshaft was sitting in place, I then had to rotate the bottom end until cylinder one was at TDC (and make sure it wasn’t 180 degrees out of phase). From here, it is a matter of aligning the slot in the side of the camshaft with the face of the head.
Once I achieved this, the sprocket could be bolted to the camshaft and the timing double checked. Before placing the valve cover on the head, new rubber pucks had to be installed over the holes for the head studs. After reading some forums, apparently this was a common area for oil leaks. As such, I put some hondabond on the rim of each puck before installation.
The valve cover rockers were then held up with elastic bands over the top of the cover, this is so you can install the valve cover without damaging the valves. I could then place the valve cover on the head and torque it down to spec.
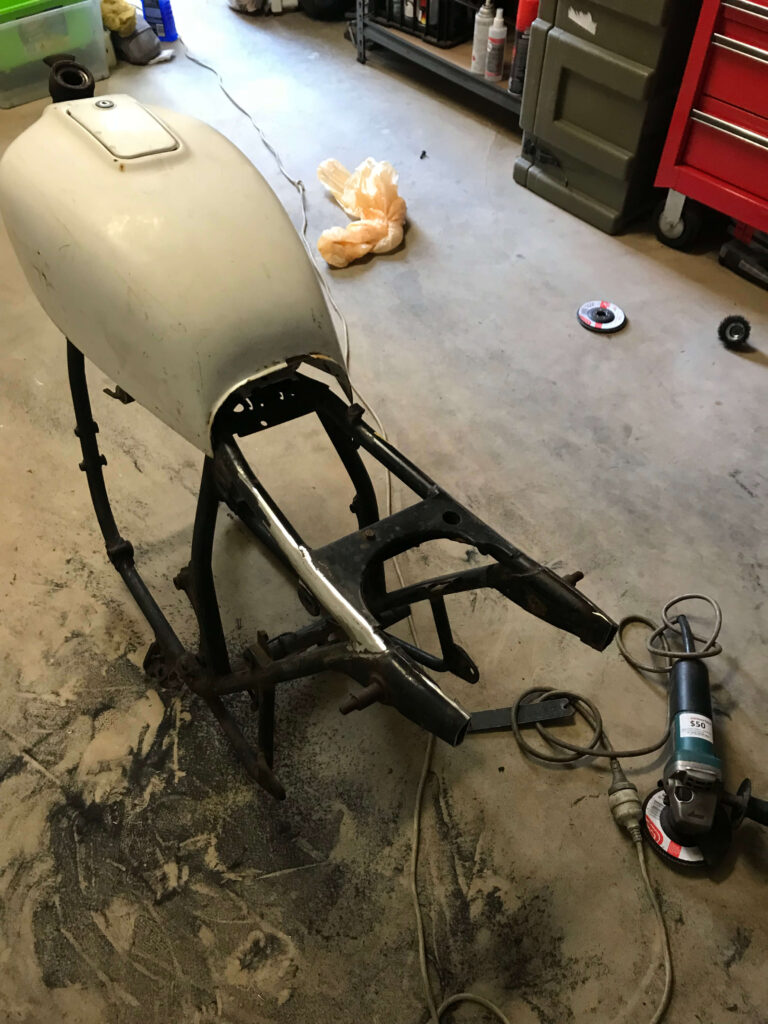
Putting the engine into the frame
With the top and bottom end of the engine reassembled, ithe engine was finally ready to be placed into the frame. To do this solo, I turned the engine on it’s side and lowered the engine frame onto it from this angle (with towels taped to various parts of the frame to make sure I didn’t damage the new paint). I could then insert the threaded rods into the frame and engine, and then bolt them together. From here. I could then muscle up the frame and engine. Voila!